Block Types
Contract templates are built from blocks. Think of blocks as the building pieces of your contract. Each block type has a different purpose: some display text, some collect information from the customer, and some let the customer sign.
There are seven block types in total:
| Block type | Purpose |
|---|---|
| Heading | Displays a title or section heading |
| Text | Displays a paragraph of text |
| Input | A text field for the customer to type into |
| Date | A date picker for the customer to select a date |
| Yes/No | A choice between two options |
| Checkbox | A single checkbox the customer can check |
| Signature | A field where the customer draws their signature |
How to edit block settings
Section titled “How to edit block settings”To change the settings of any block:
- Tap on the block in the block editor to select it (it will get a purple outline)
- Tap the pencil button that appears above the + button
- A settings panel will slide up from the bottom of the screen
- Make your changes
- Tap Save at the bottom to keep your changes, or Cancel to discard them
Always tap Save when you are done editing a block’s settings. If you close the panel without tapping Save, your changes will not be kept.
Heading block
Section titled “Heading block”Use heading blocks to add titles and section headers to your contract. For example, you might use a heading at the top of the contract with your studio name, or to separate different sections like “Personal Information” and “Health Questions”.
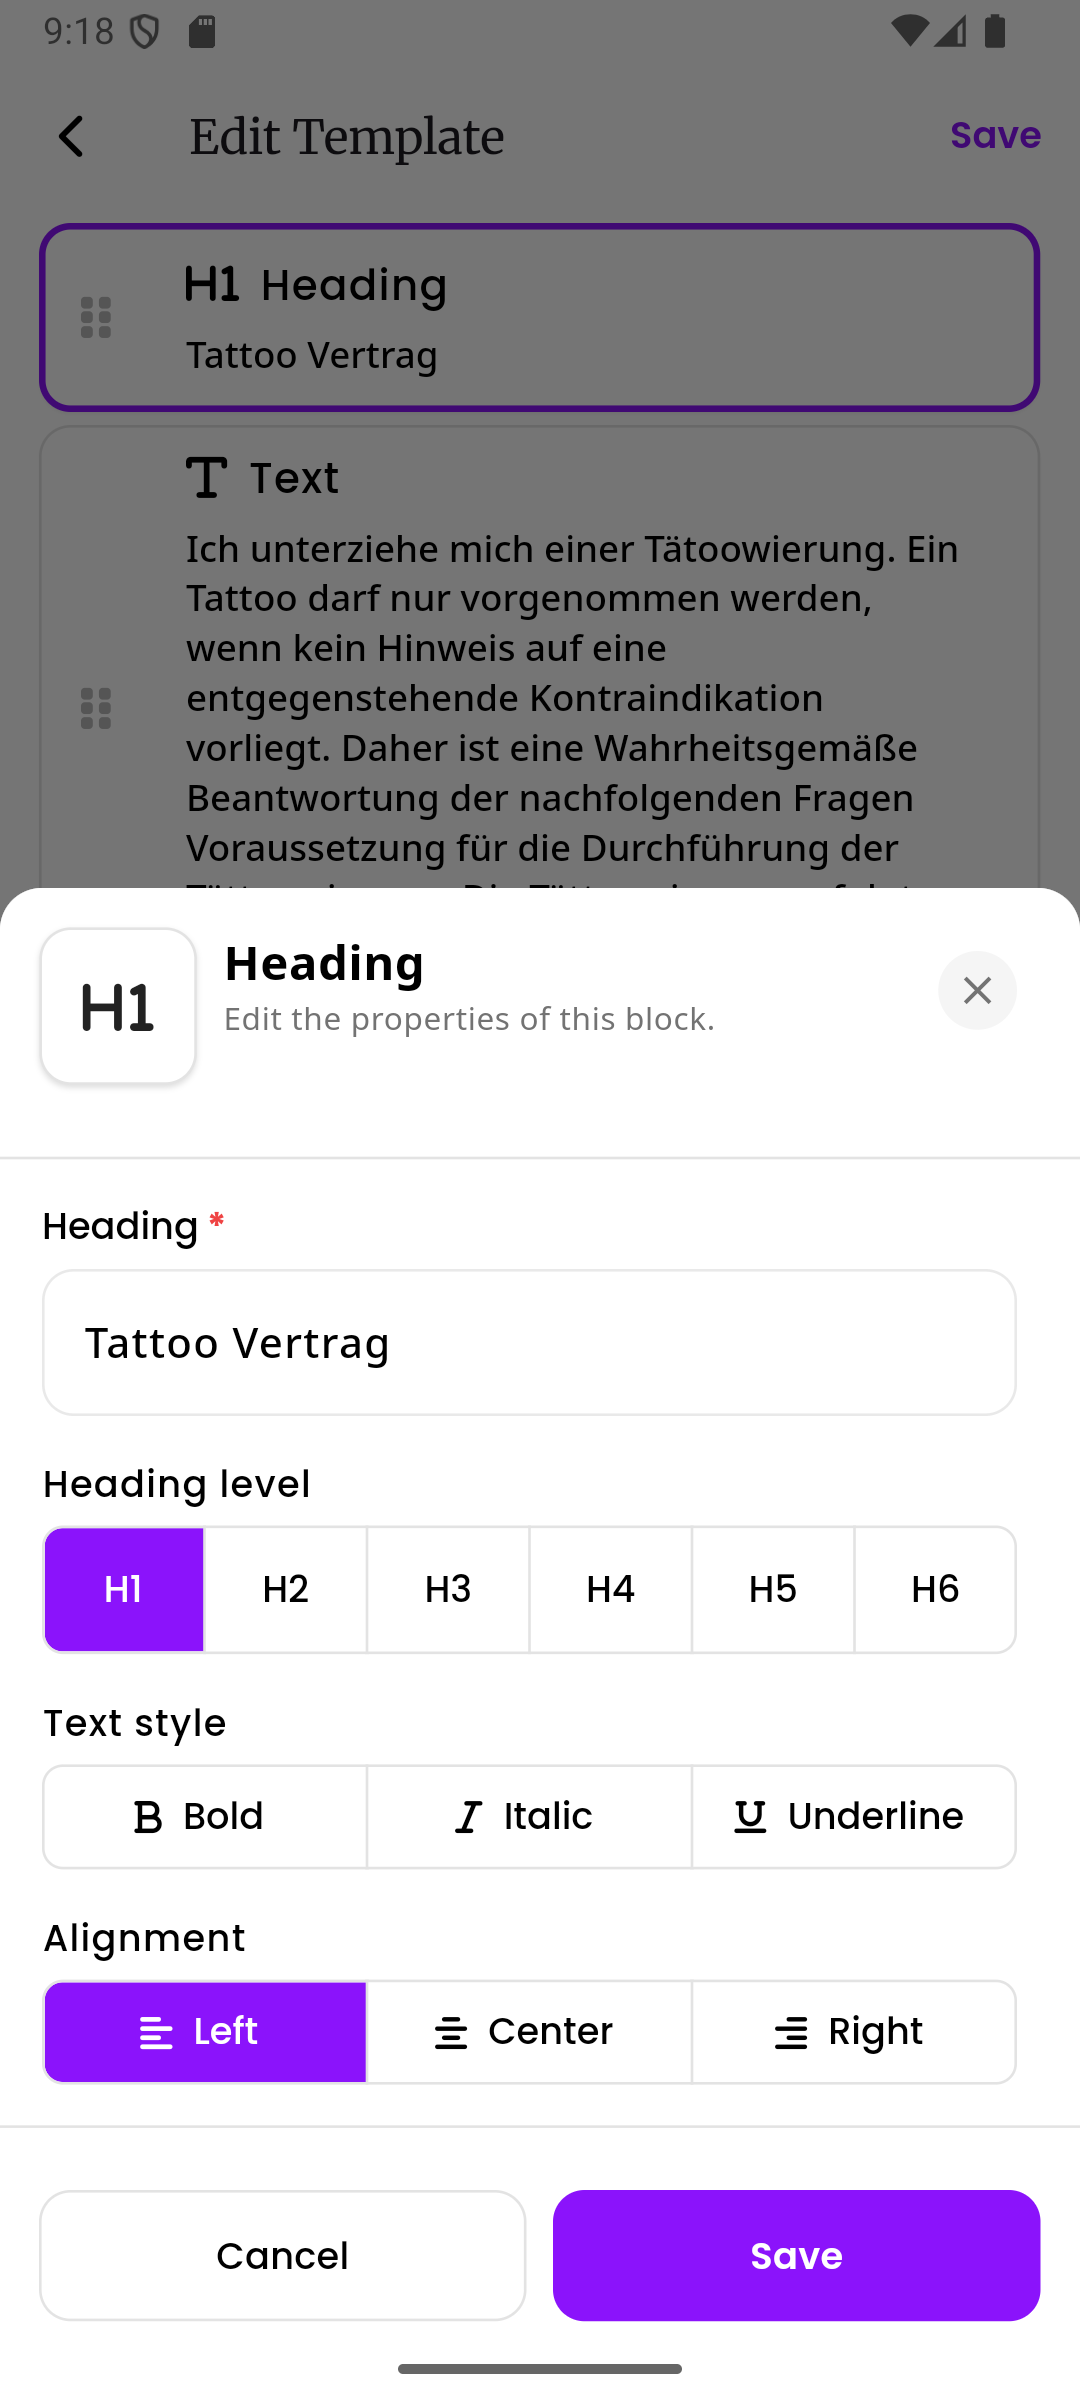
Heading settings
Section titled “Heading settings”Heading (required) The text of the heading. This is what the customer will see on the contract.
Heading level Controls how big the heading appears. Choose from H1 through H6:
- H1 is the largest and most prominent, best for the main title of your contract
- H2 is good for major section titles
- H3 through H6 get progressively smaller, useful for sub-sections
Text style You can apply one or more text styles to change how the heading looks:
- Bold makes the text thicker and heavier
- Italic makes the text slanted
- Underline adds a line below the text
You can combine these freely. For example, you can make a heading both bold and underlined at the same time.
Alignment Controls where the heading text is positioned:
- Left places the text on the left side (this is the default)
- Center places the text in the middle
- Right places the text on the right side
Text block
Section titled “Text block”Use text blocks to add paragraphs of information to your contract. This is where you write the actual content that the customer should read, such as disclaimers, instructions, or explanations.
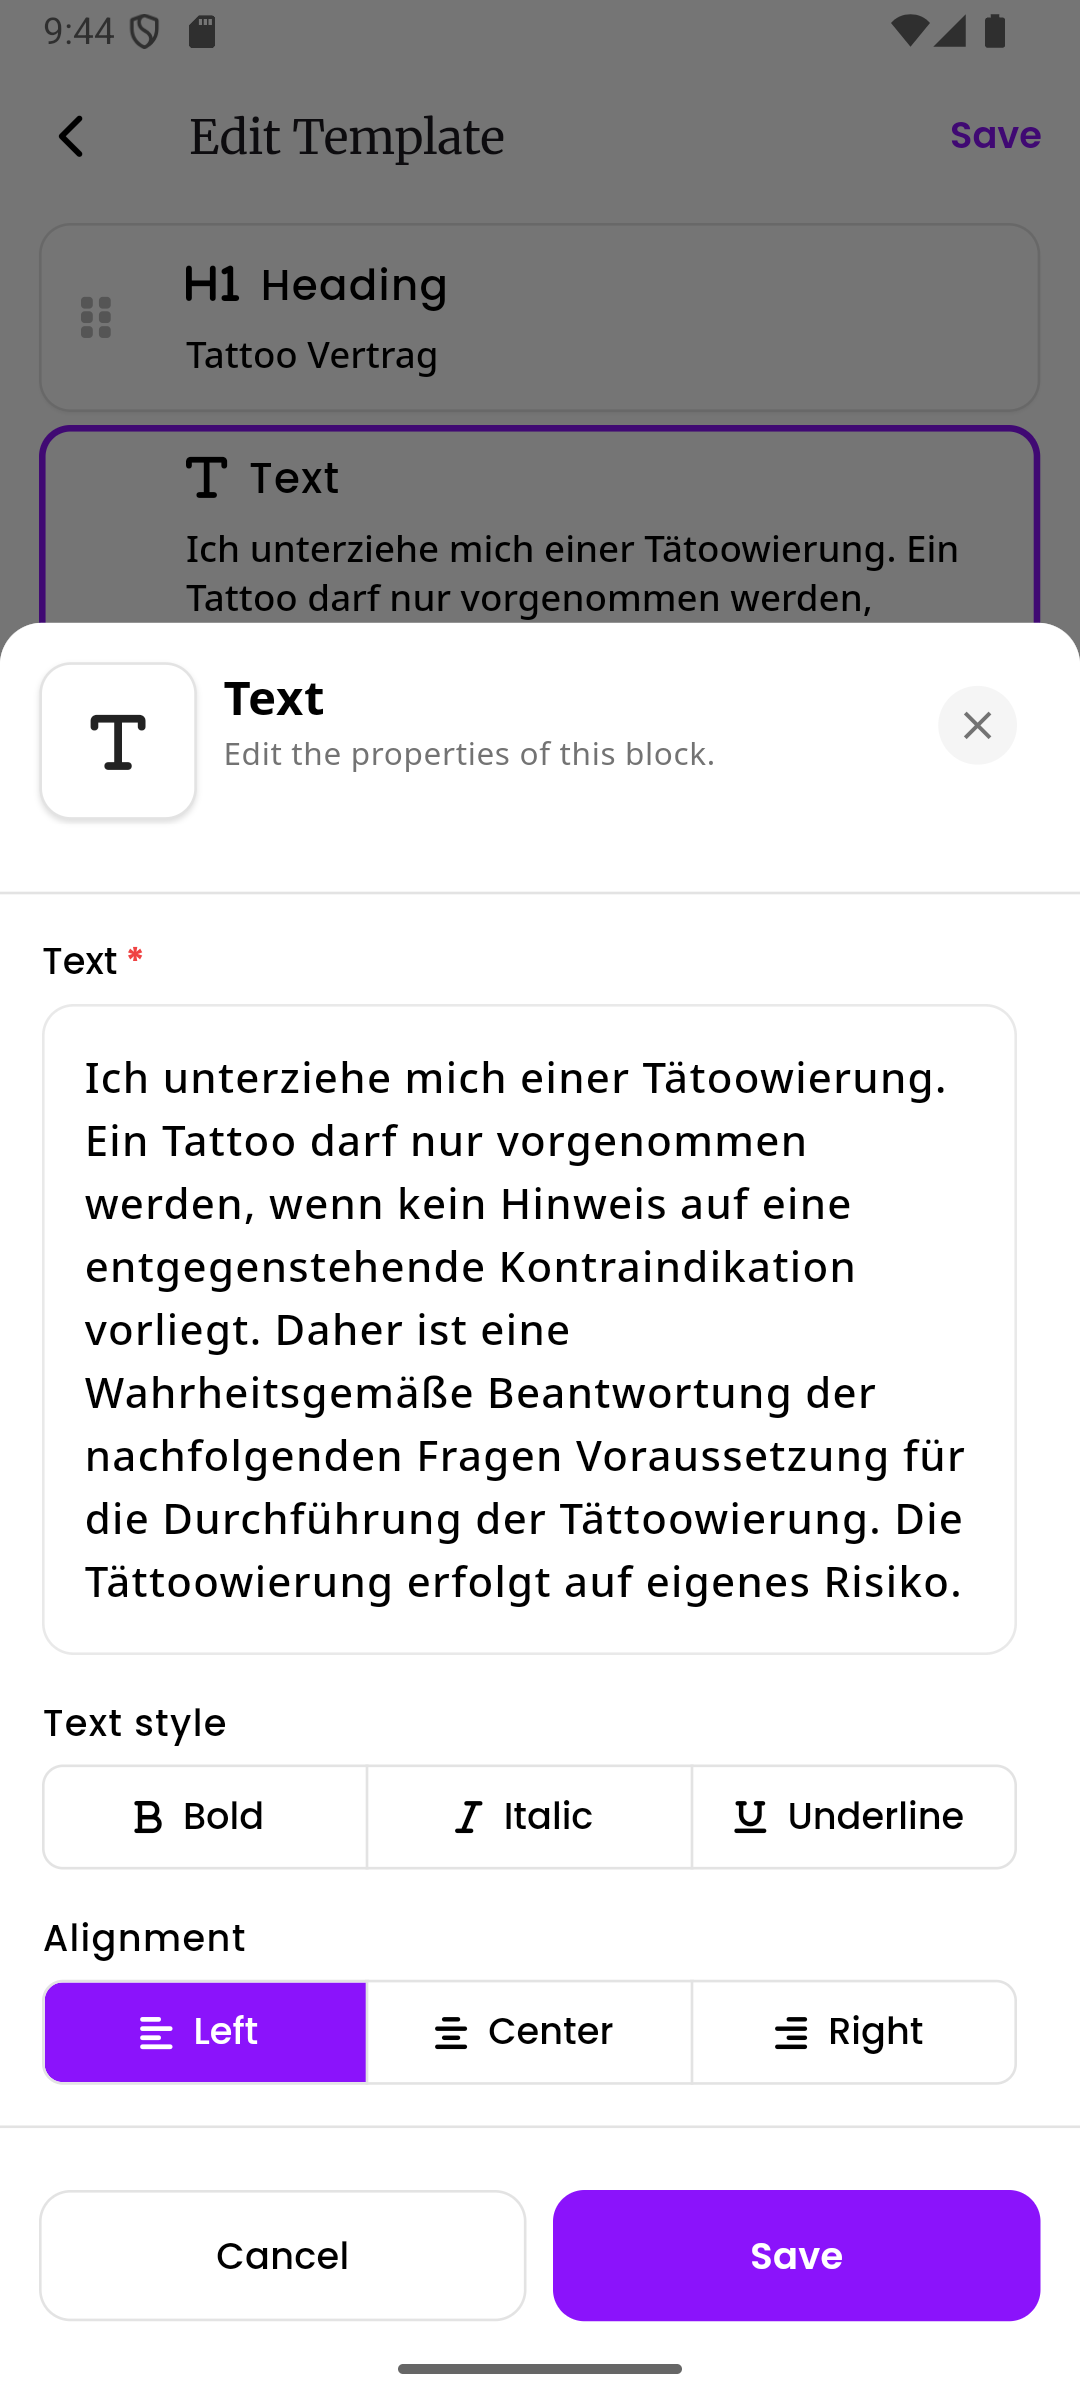
Text settings
Section titled “Text settings”Text (required) The content of the text block. You can write as much text as you need here. This is what will be displayed on the contract.
Text style Just like the heading block, you can apply one or more styles:
- Bold makes the text thicker and heavier
- Italic makes the text slanted
- Underline adds a line below the text
Alignment Controls where the text is positioned:
- Left places the text on the left side (this is the default)
- Center places the text in the middle
- Right places the text on the right side
Input block
Section titled “Input block”Use input blocks to create fields that the customer fills in. For example, you might add input fields for the customer’s name, email address, phone number, or postal code.
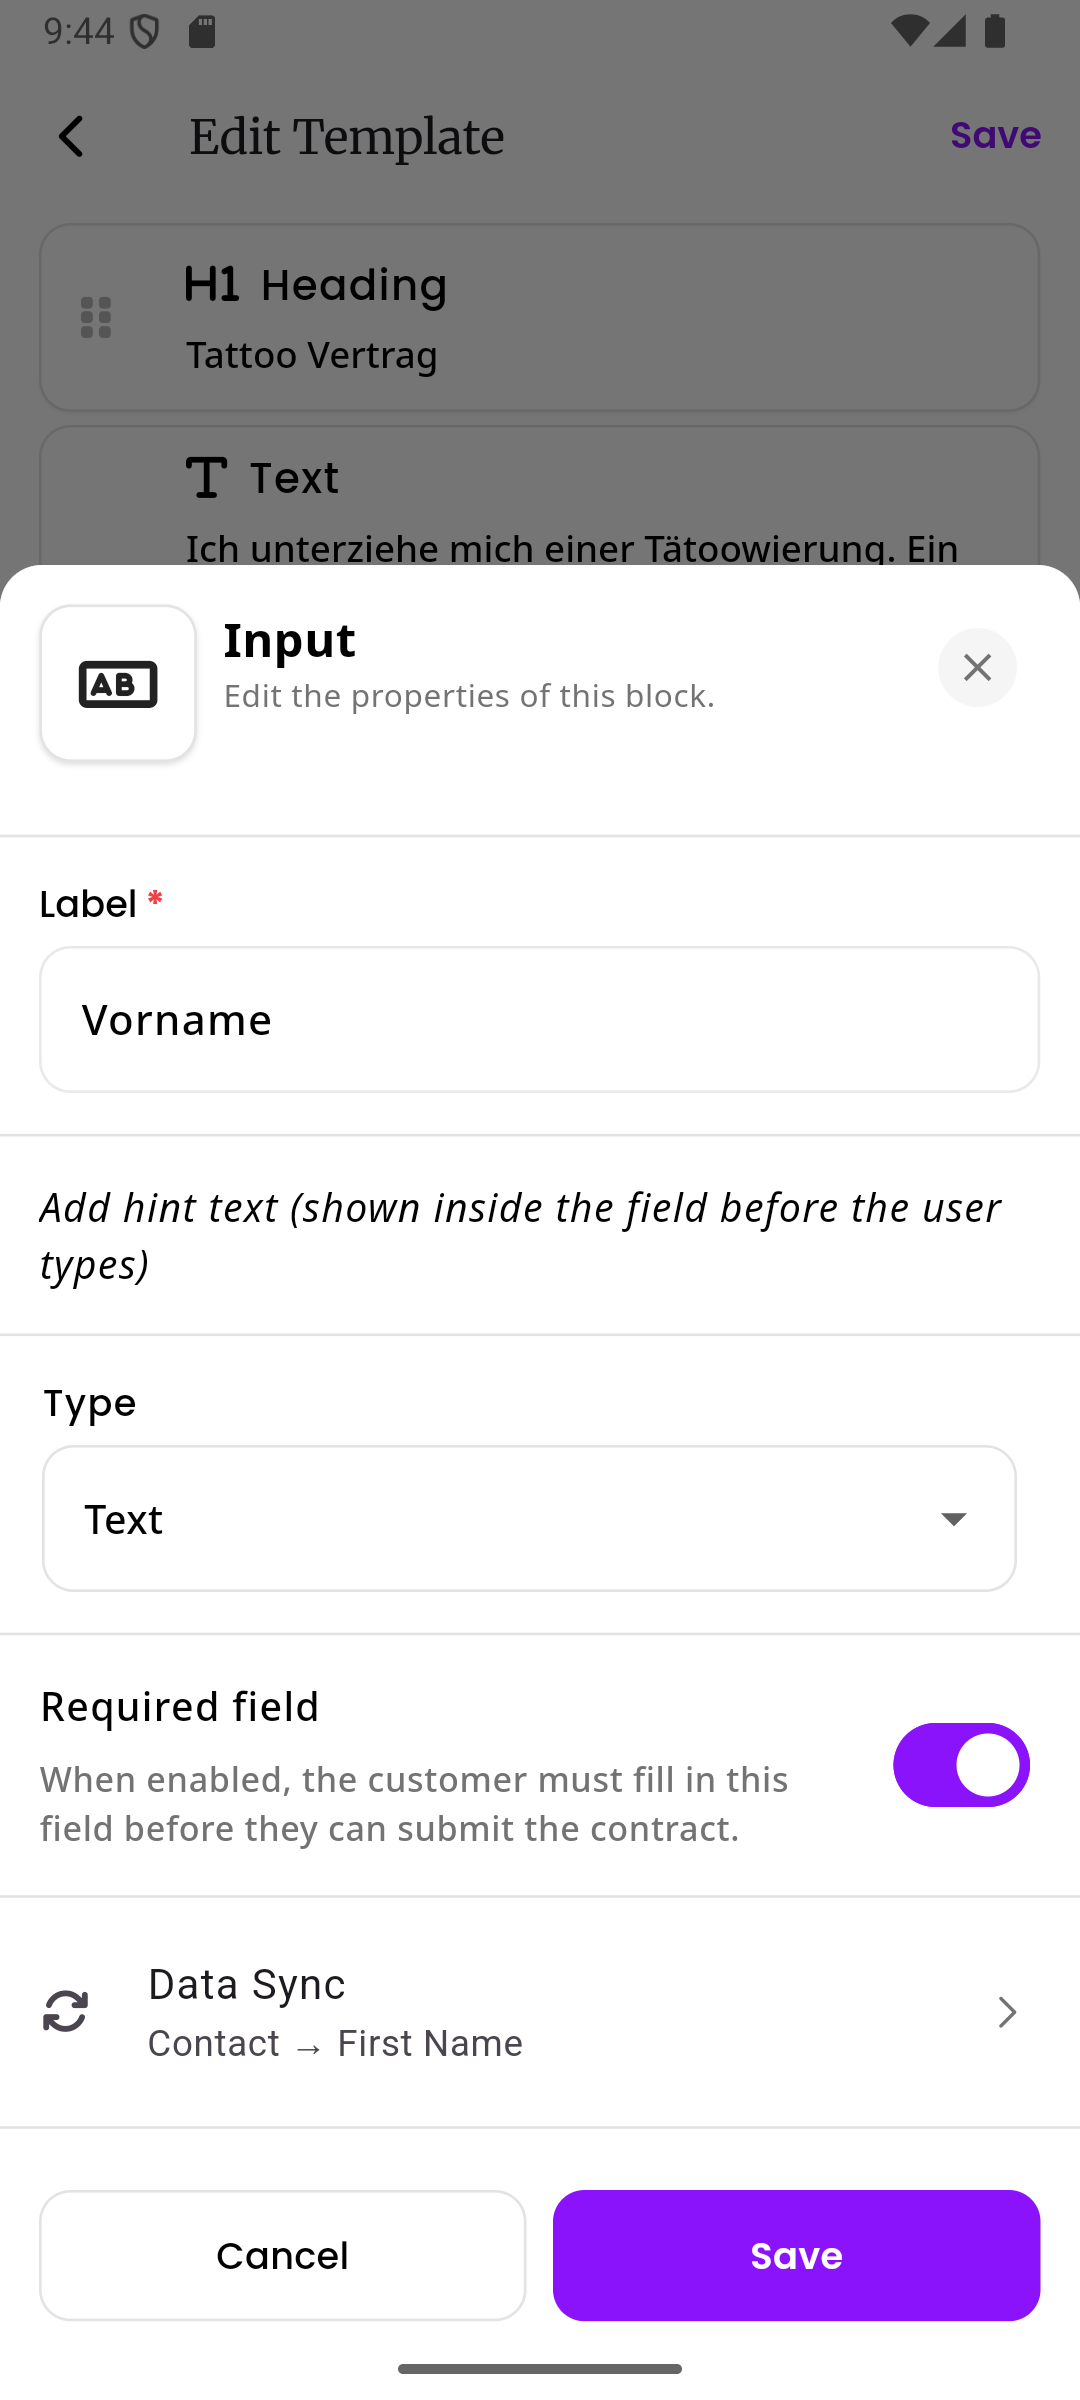
Input settings
Section titled “Input settings”Label (required) The name of the field that the customer sees. For example, “First Name”, “Email Address”, or “Phone Number”.
Hint text A short piece of text that appears inside the field before the customer starts typing. It gives the customer a hint about what they should enter. For example, a hint for an email field might say “your@email.com”.
Type Controls what kind of information the field accepts. Tap the dropdown to see the available options:
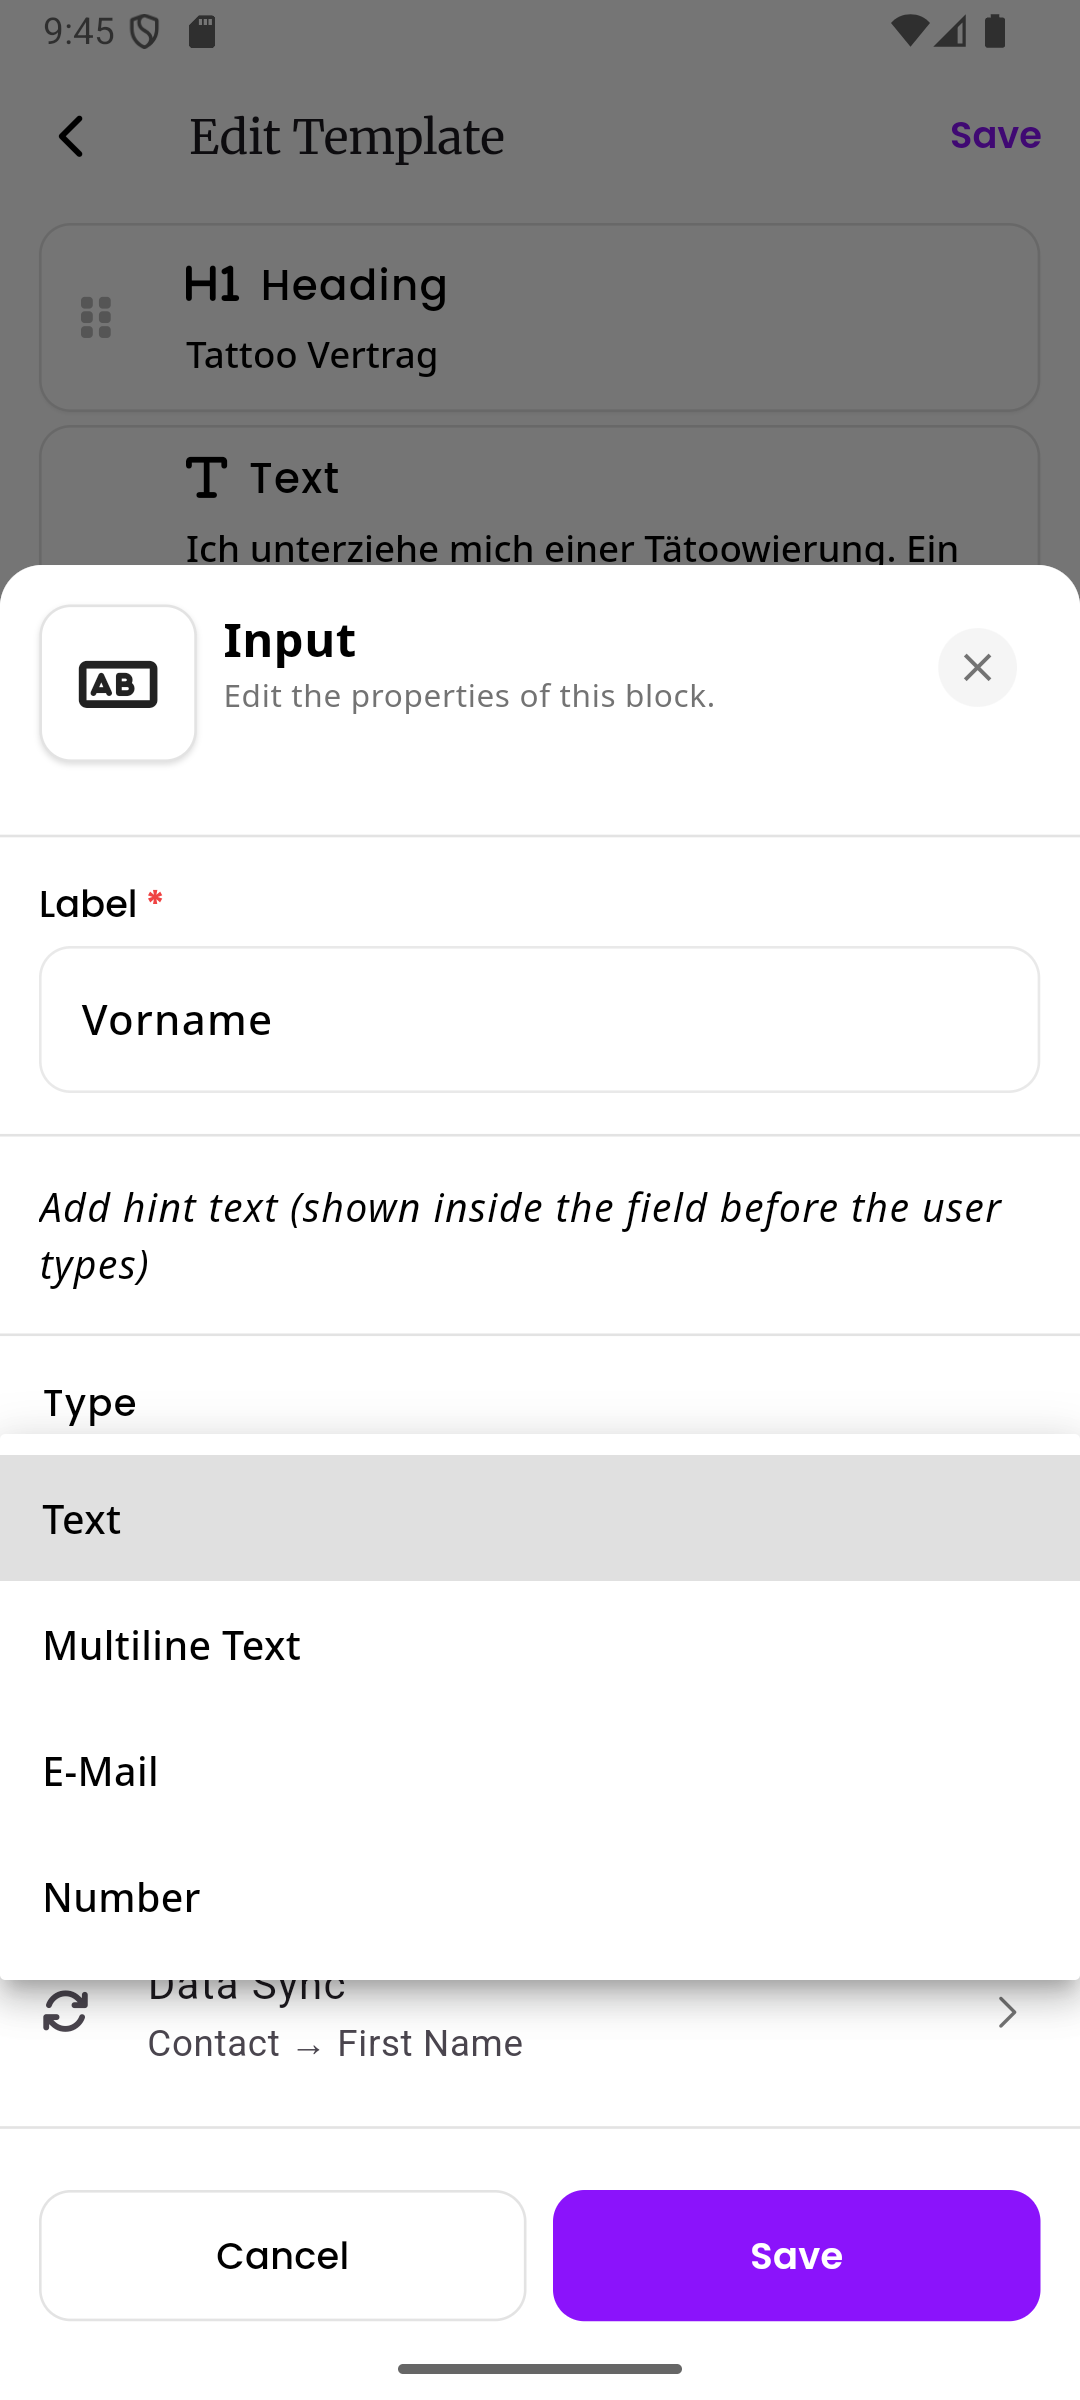
- Text is the default. A single-line text field for short answers like a name or city
- Multiline Text is a larger text field that allows multiple lines. Use this when the customer might need to write more, like allergy details or special notes
- E-Mail is specifically for email addresses. The customer’s keyboard will show the @ symbol for easier entry
- Number is for numbers only. The customer’s keyboard will show a number pad
Required field When turned on, the customer must fill in this field before they can submit the contract. Required fields are marked with a red asterisk (*) on the contract.
Data Sync This is an optional but powerful feature. When configured, the value that the customer types into this field will automatically be saved to their customer profile in inkStar. This saves you from having to manually update customer records.
See Data Sync below for a full explanation.
Date block
Section titled “Date block”Use date blocks when you need the customer to pick a date. The most common example is asking for the customer’s date of birth.
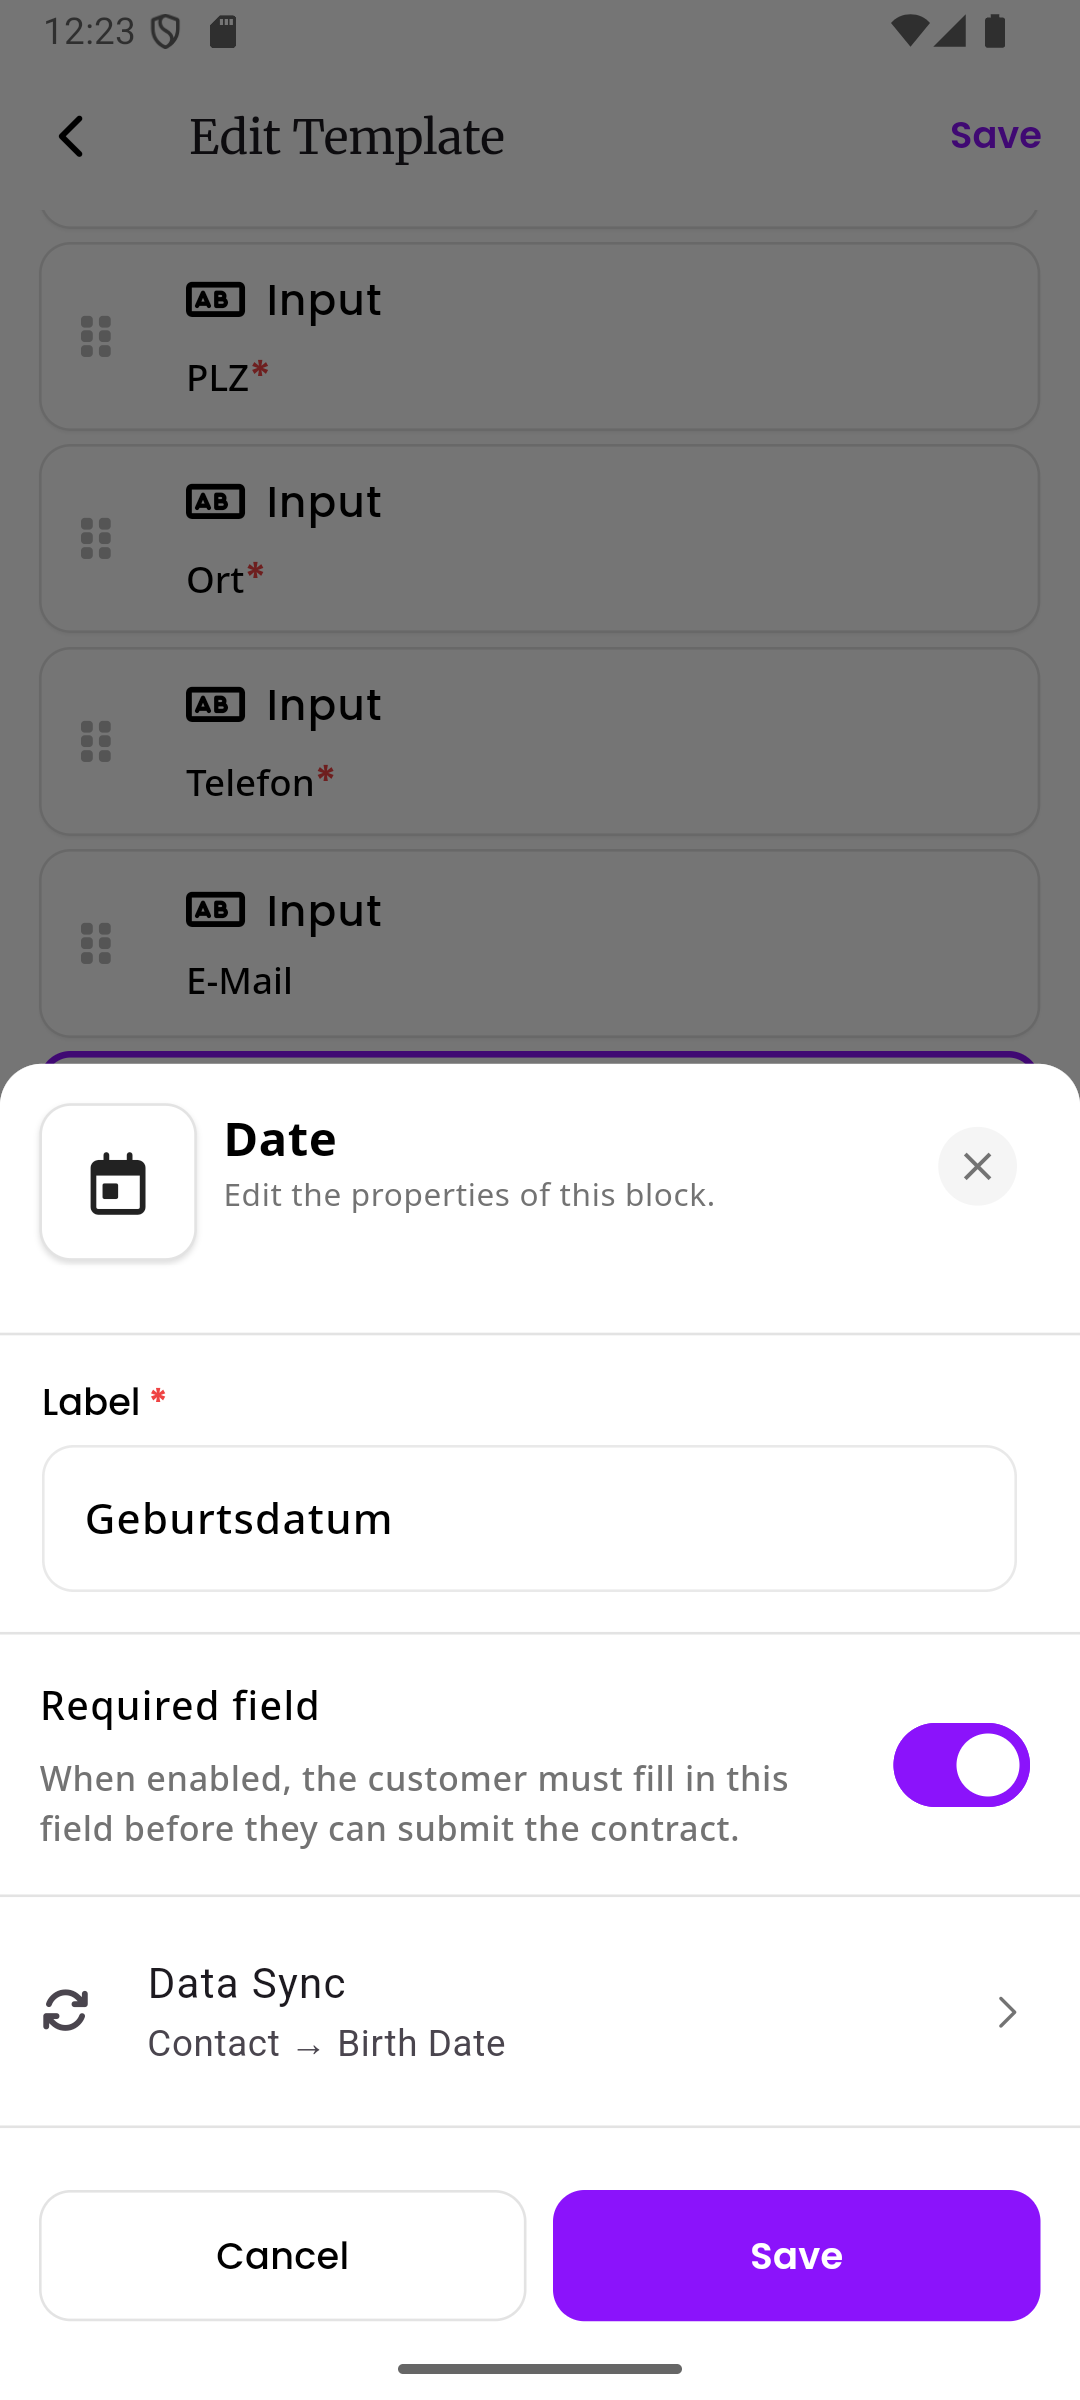
Date settings
Section titled “Date settings”Label (required) The name of the date field that the customer sees. For example, “Date of Birth” or “Preferred Appointment Date”.
Required field When turned on, the customer must select a date before they can submit the contract.
Data Sync Just like input blocks, date blocks also support data sync. For example, you can sync the customer’s date of birth to the “Birth Date” field on their customer profile. See Data Sync below.
Yes/No block
Section titled “Yes/No block”Use yes/no blocks when you need the customer to answer a simple yes-or-no question. For example: “Do you have any allergies?”, “Are you currently pregnant?”, or “Have you consumed alcohol in the last 24 hours?”.
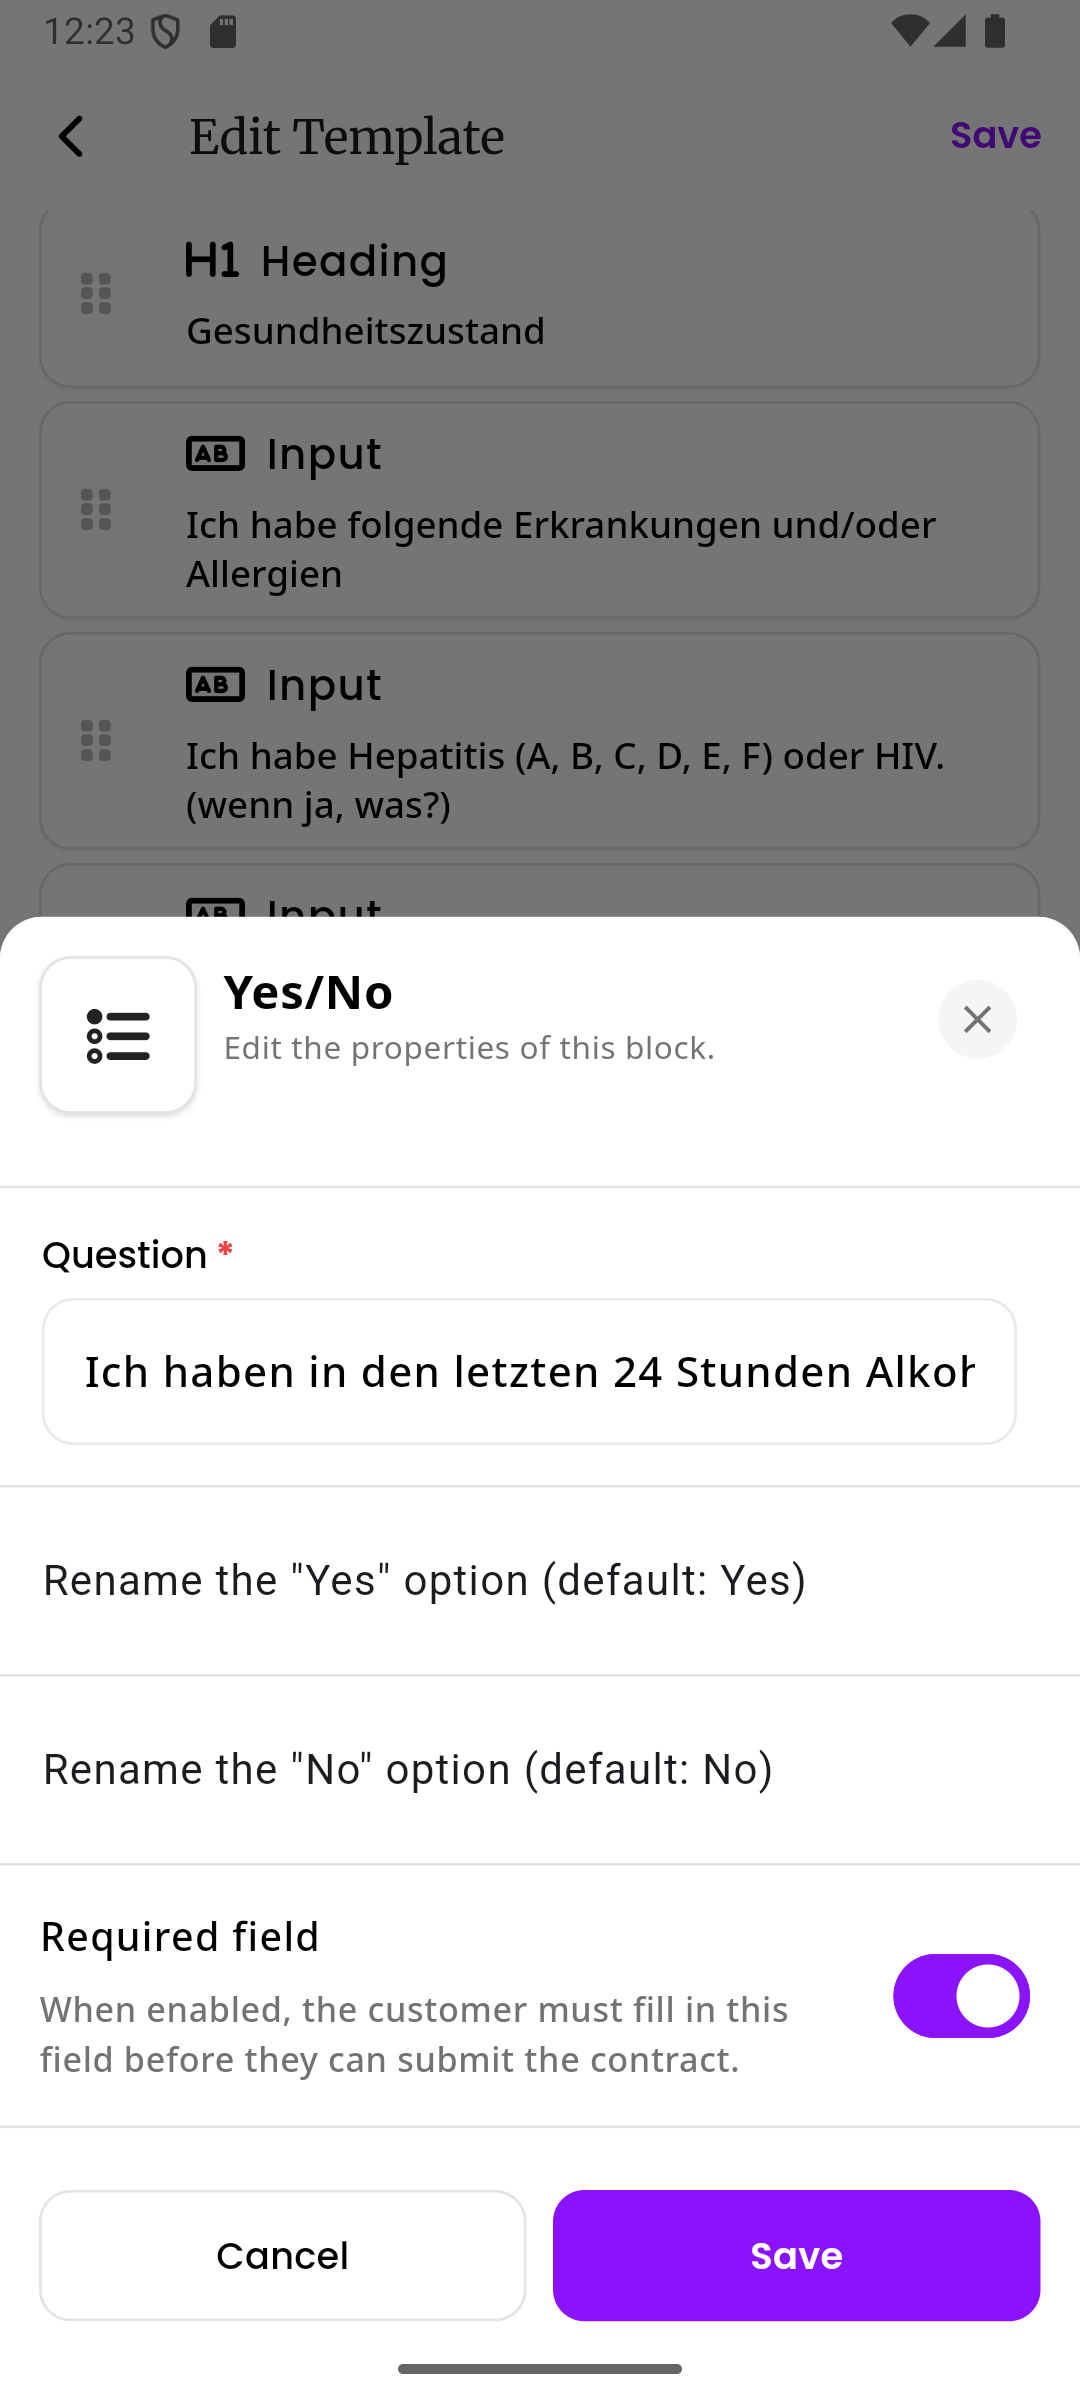
Yes/No settings
Section titled “Yes/No settings”Question (required) The question text that the customer sees. Write it as a clear, simple question.
Rename the “Yes” option (default: Yes) A custom label for the “yes” option. If you leave this empty, the default text “Yes” is used. You might customize this to say something more specific like “I confirm” or “Agreed”.
Rename the “No” option (default: No) A custom label for the “no” option. If you leave this empty, the default text “No” is used. You might customize this to say something like “I decline” or “Not applicable”.
Required field When turned on, the customer must select either yes or no before they can submit the contract.
Checkbox block
Section titled “Checkbox block”Use checkbox blocks for simple confirmations or acknowledgments. Unlike the yes/no block which presents two choices, a checkbox is a single item that the customer either checks or leaves unchecked.
Common examples: “I have read and understood the aftercare instructions”, “I confirm that all information I provided is correct”, or “I agree to the studio rules”.
Checkbox settings
Section titled “Checkbox settings”Label (required) The text that appears next to the checkbox. Write it as a clear statement that the customer is agreeing to or confirming.
Required field When turned on, the customer must check this checkbox before they can submit the contract.
Signature block
Section titled “Signature block”Use signature blocks to collect the customer’s signature on the contract. The customer can draw their signature directly on their phone or tablet screen.
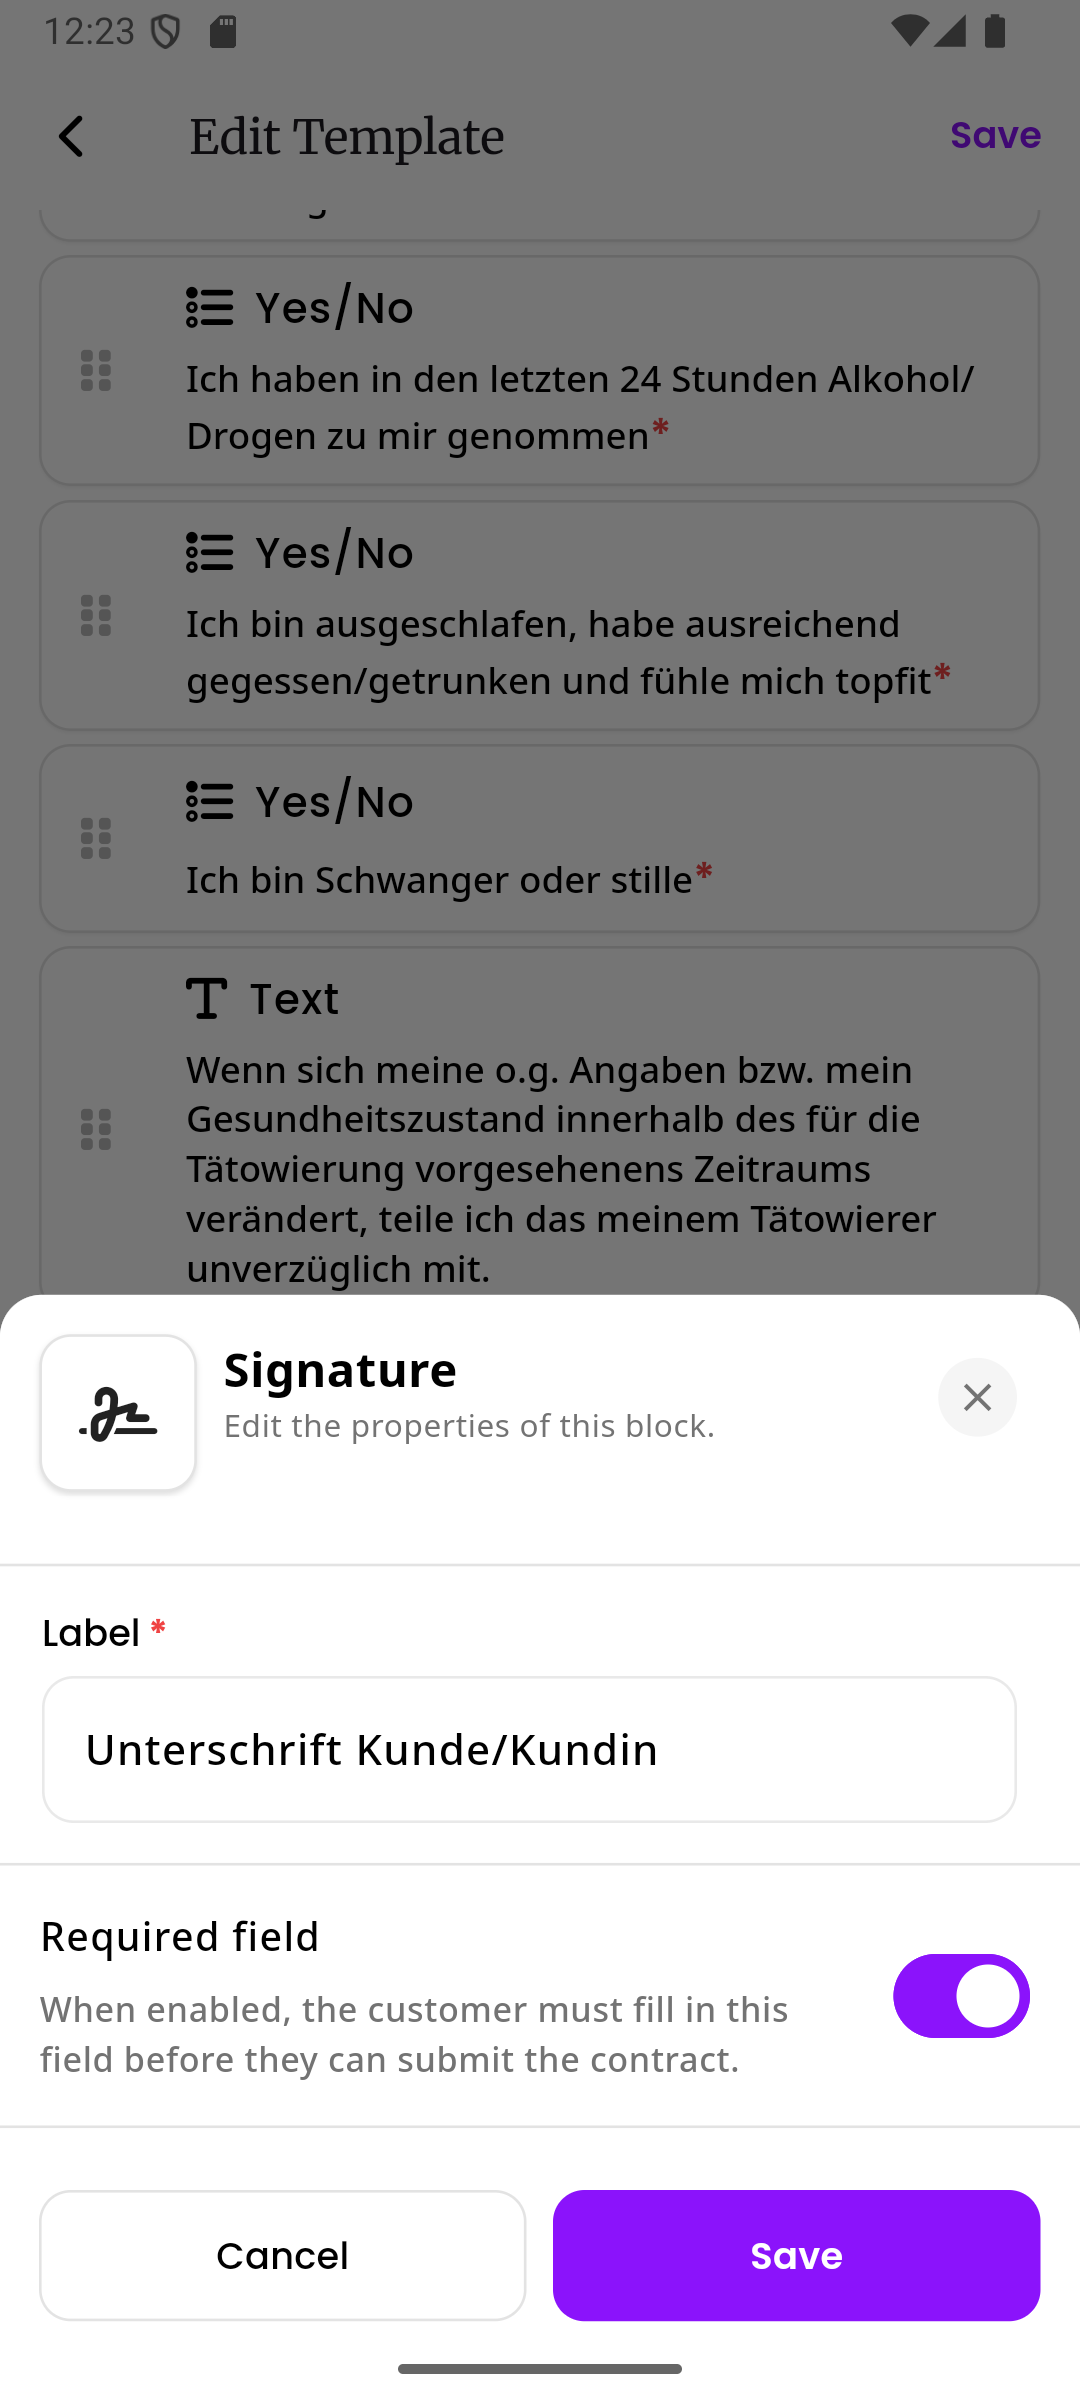
Signature settings
Section titled “Signature settings”Label (required) The text that appears above the signature area. For example, “Customer Signature”, “Parent/Guardian Signature”, or “Artist Signature”.
Required field When turned on, the customer must provide a signature before they can submit the contract. For most contracts, you will want this turned on.
See Digital Signatures for more details about how customers sign contracts.
Data Sync
Section titled “Data Sync”Data Sync is a feature available on input blocks and date blocks. It connects the fields on your contract to the customer’s profile in inkStar. When the customer fills out a field that has Data Sync configured, the value they enter is automatically saved to their customer record. This means you don’t have to manually copy information from the contract into the customer’s profile.
For example, if your contract asks for the customer’s first name, email, and date of birth, and you set up Data Sync on those fields, all of that information will be saved to the customer’s profile as soon as they submit the contract.
How Data Sync works with existing and new customers
Section titled “How Data Sync works with existing and new customers”Data Sync behaves differently depending on whether the contract is linked to an existing customer or not:
Existing customer When you create a contract for a customer that already exists in inkStar, Data Sync will update their existing customer record. For example, if the customer’s email address was missing from their profile and they type it into the contract, the email will be added to their profile automatically.
New customer (no customer linked) When a contract is not linked to an existing customer, Data Sync will create a brand new customer record when the contract is submitted. inkStar takes all the synced fields from the contract (name, email, address, etc.) and uses them to build a new customer profile. This new customer is then automatically linked to the contract and, if the contract is tied to an appointment, the customer is also linked to that appointment.
This is especially useful for walk-in scenarios or when you send a contract link before you have the customer in your system. The customer fills out their own details, and inkStar creates their profile for you.
How to set up Data Sync
Section titled “How to set up Data Sync”In the input or date block settings, you will see a Data Sync section at the bottom. Tap on it to open the Data Sync configuration page.
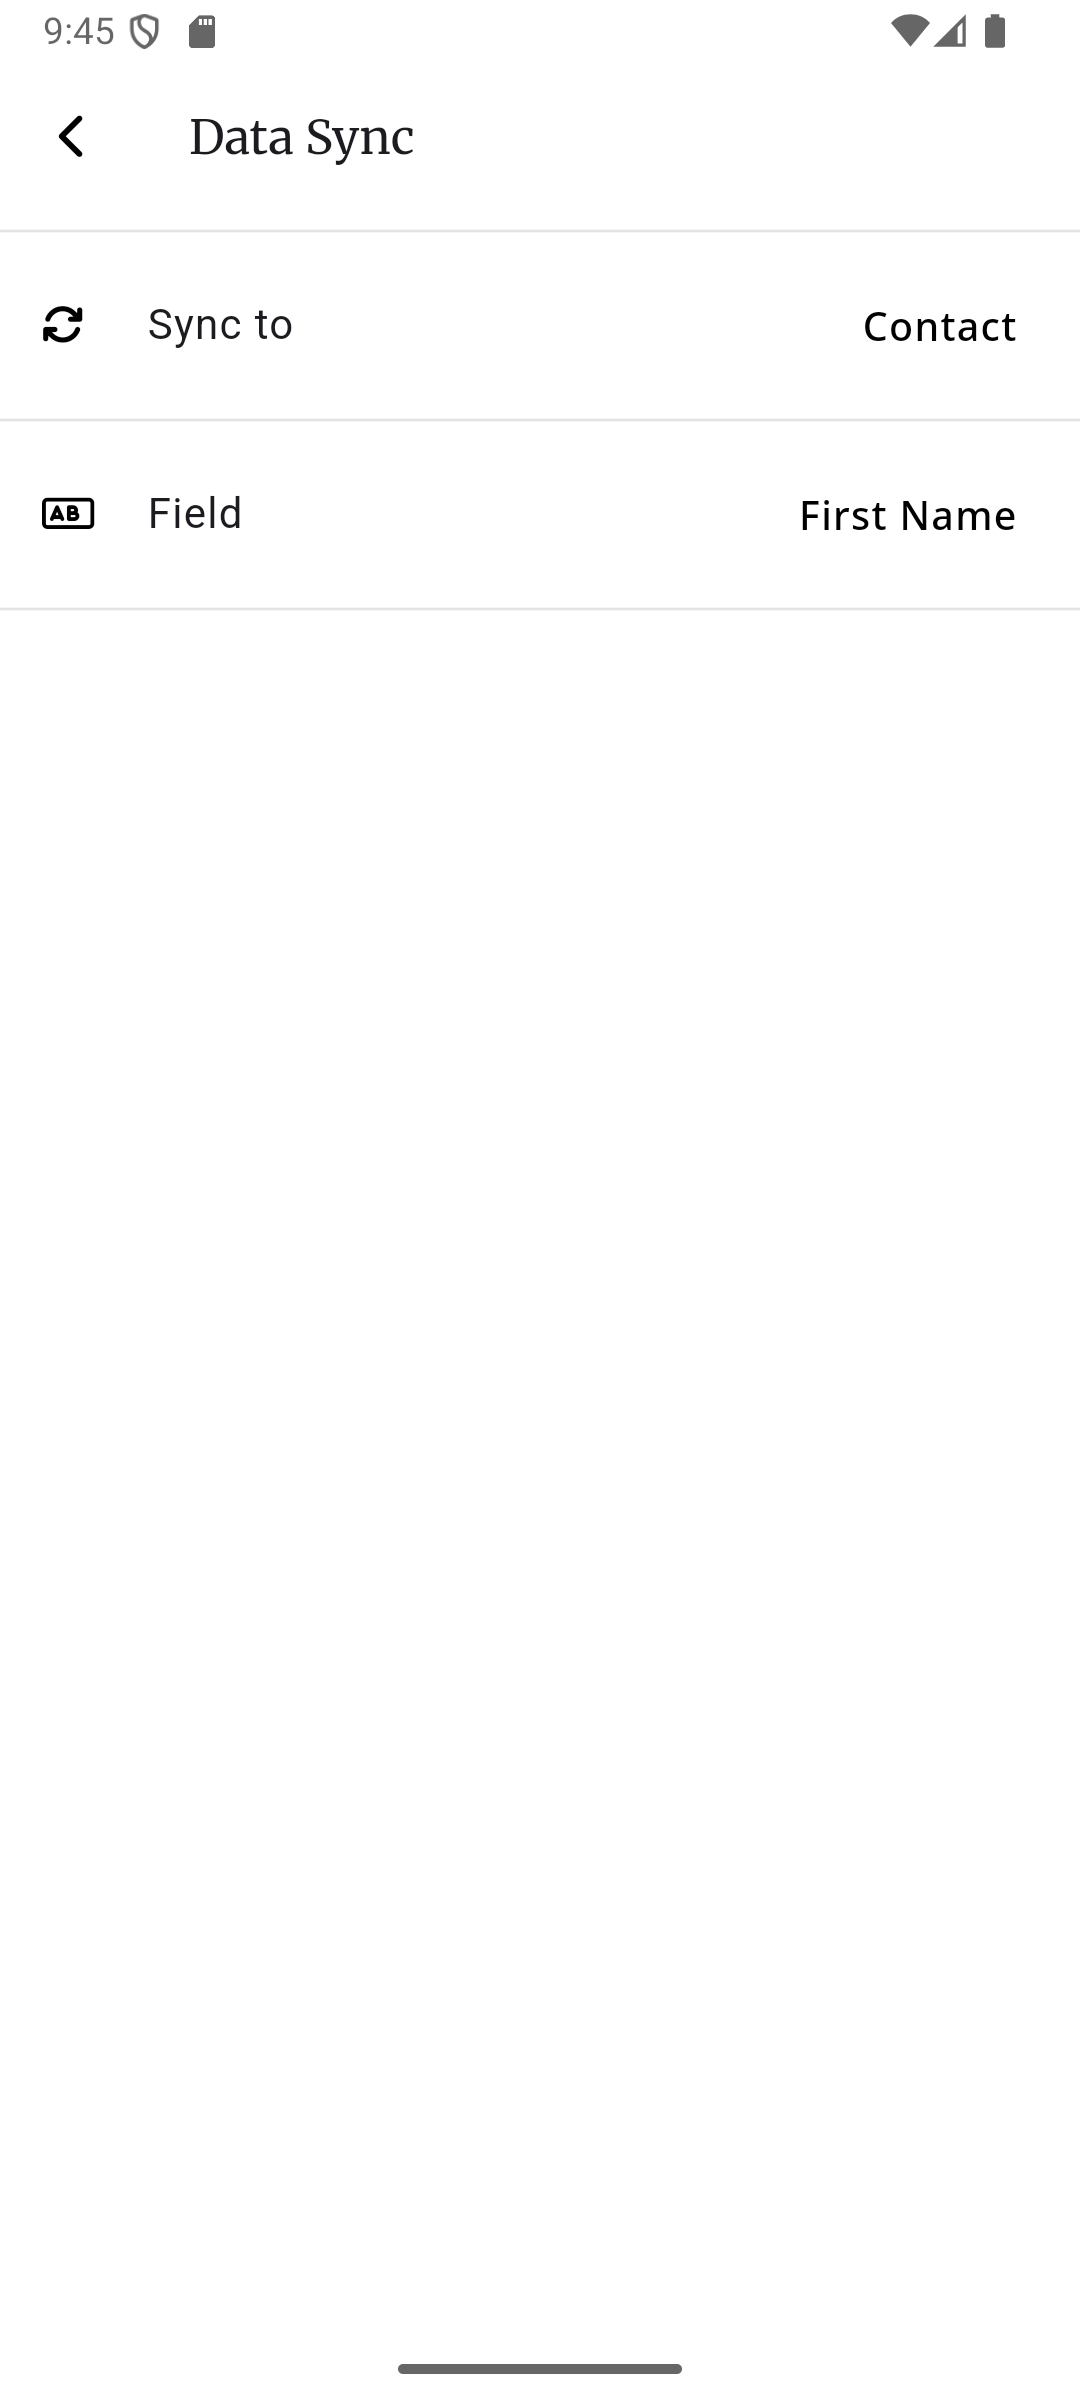
There are two settings you need to configure:
Sync to (the target) This tells inkStar where the data should be saved. Tap on it to see the available options.
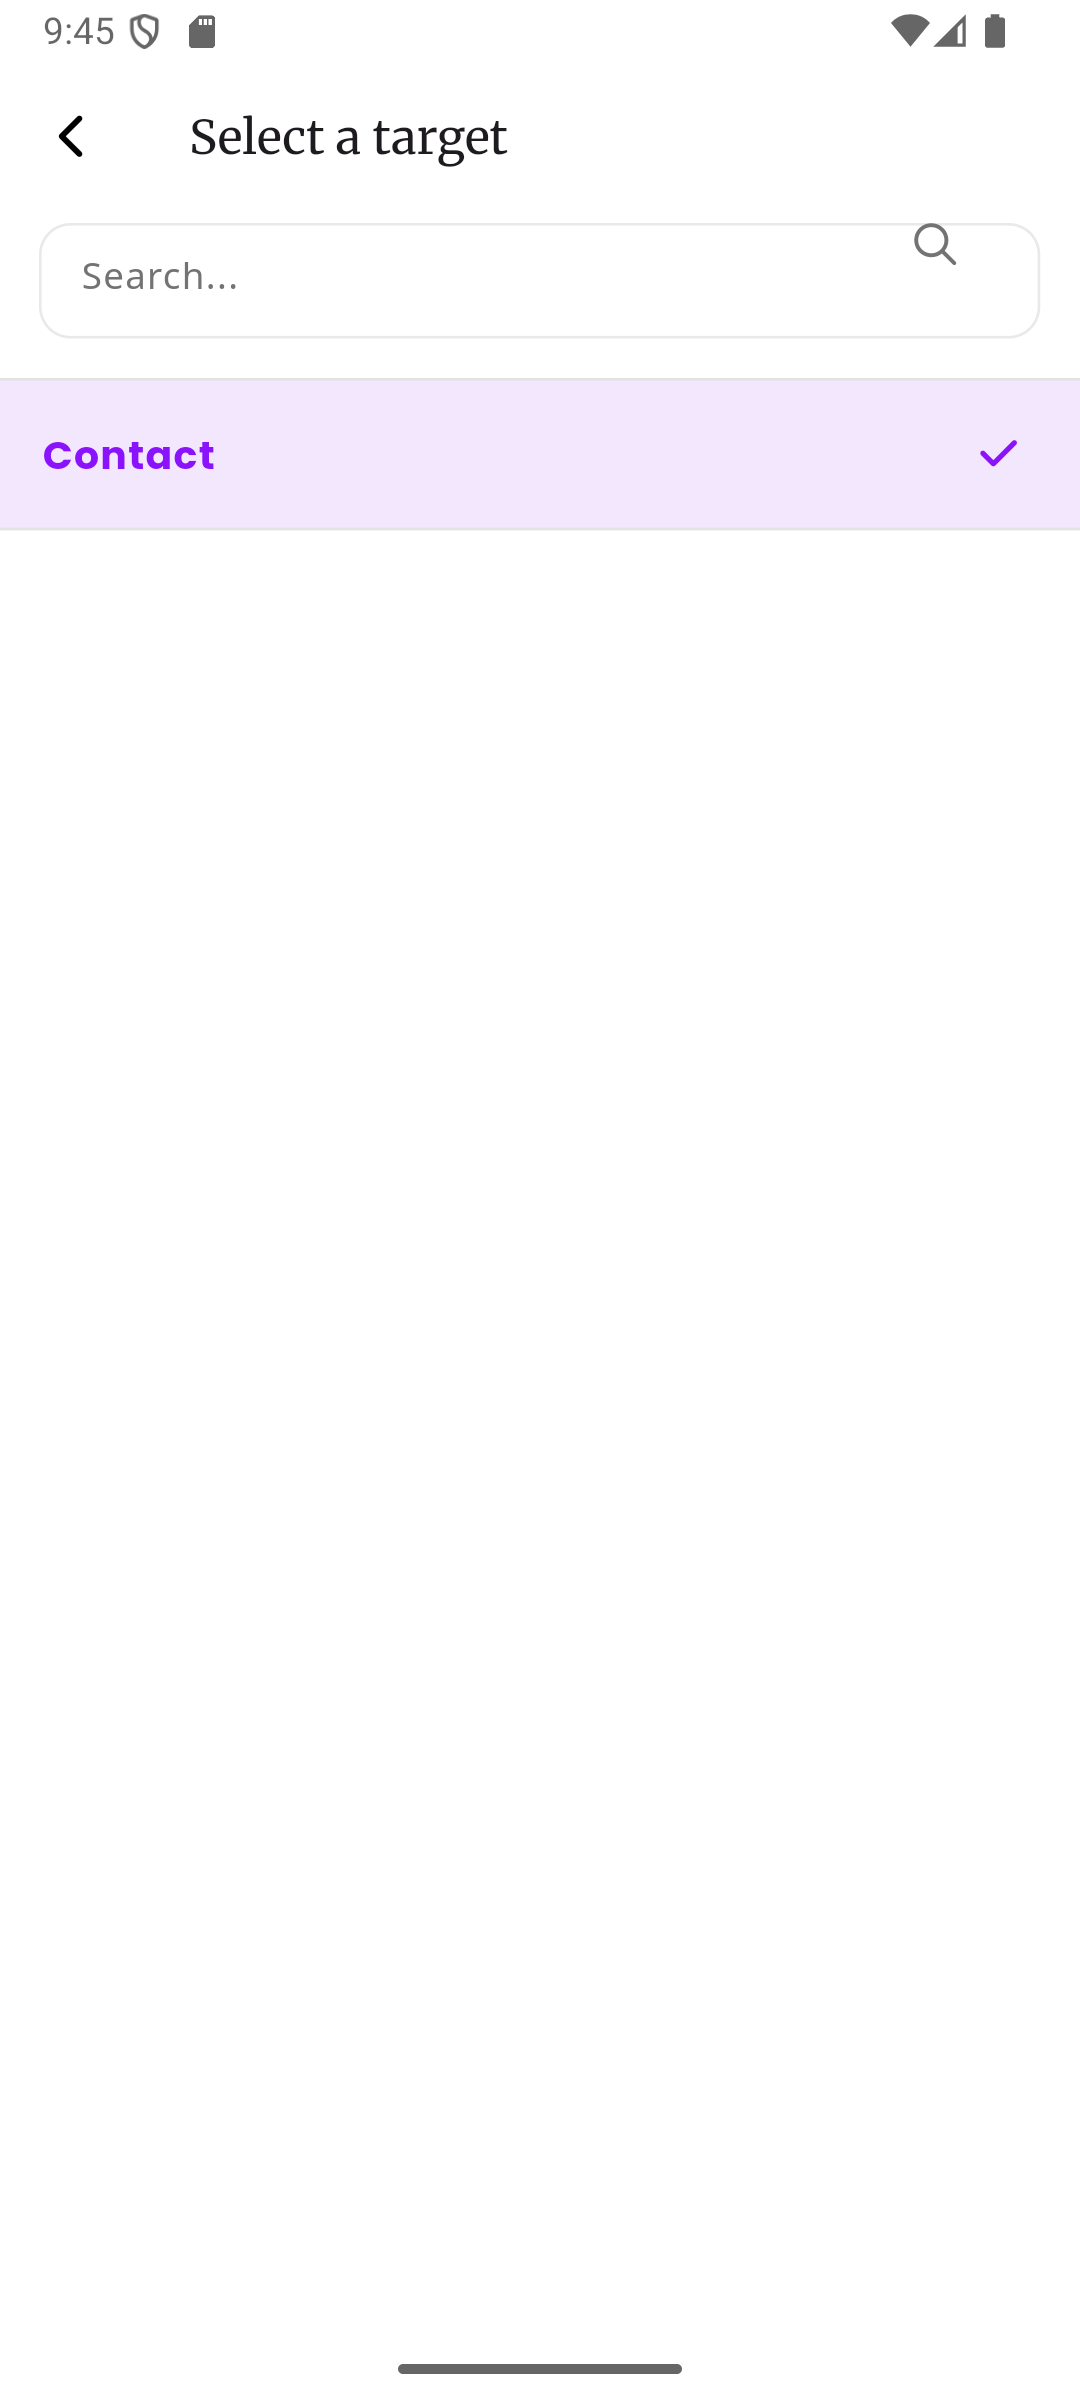
Currently, the only available target is Contact, which means the data will be saved to the customer’s contact record in inkStar.
Field This tells inkStar which specific field on the customer record should be updated with the value the customer enters. Tap on it to see all available fields.
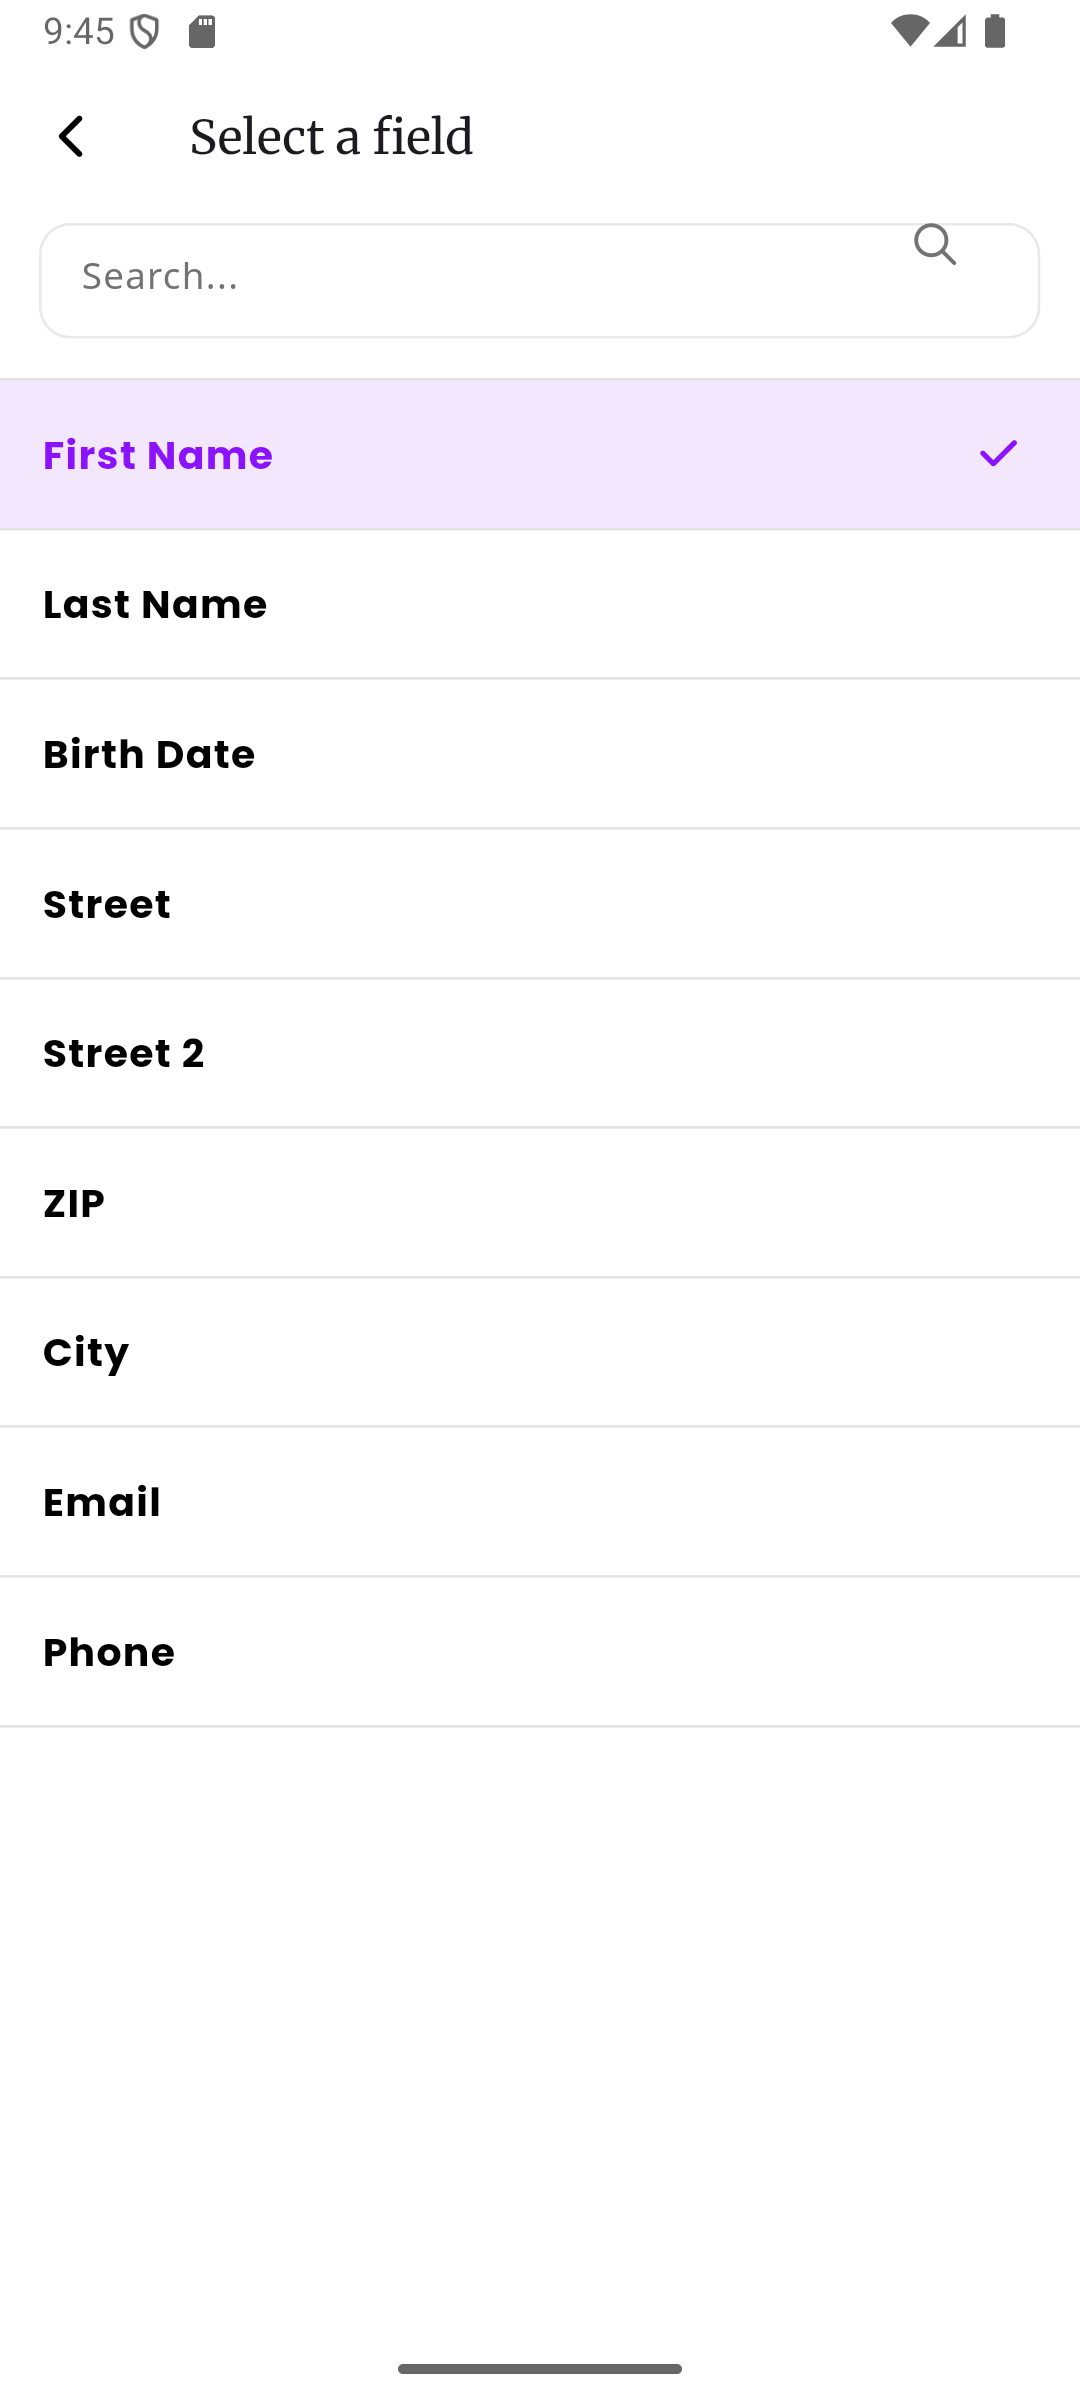
The available fields are:
| Field | What it updates on the customer profile |
|---|---|
| First Name | The customer’s first name |
| Last Name | The customer’s last name |
| Birth Date | The customer’s date of birth (best used with a date block) |
| Street | The first line of the customer’s address |
| Street 2 | The second line of the customer’s address |
| ZIP | The customer’s postal/ZIP code |
| City | The customer’s city |
| The customer’s email address | |
| Phone | The customer’s phone number |
Example: Updating an existing customer
Section titled “Example: Updating an existing customer”You have a regular customer named Anna in your system, but her phone number is missing from her profile. Your contract template has a “Phone” input field with Data Sync configured to sync to Contact > Phone. You create a contract for Anna, she fills it out and enters her phone number. When she submits the contract, her phone number is automatically saved to her customer profile. Next time you open Anna’s profile, her phone number is already there.
Example: Creating a new customer automatically
Section titled “Example: Creating a new customer automatically”A new person contacts you about getting a tattoo. You don’t have them in your system yet, so you create a contract without linking it to a customer and send them the link. Your contract template has input fields for first name, last name, email, and phone, all with Data Sync configured to the matching contact fields. The person fills out the contract, entering “Max” as their first name, “Mustermann” as their last name, and so on. When they submit the contract, inkStar automatically creates a new customer record for “Max Mustermann” with all the details they entered. This new customer is then linked to the contract and the appointment, so everything is connected without you having to do anything manually.